Showing posts with label home decor. Show all posts

Monday, April 25, 2011

Far Far Away II Quilt...done!

I've been working on this quilt for a long while now and am so glad to have it finished. This is for Emmie and Kai will get his after the baby comes. I love love love this quilt and I love love love this fabric. It is so beautiful and surprisingly soft, for being linen.

I tried my hand at freehand quilting and really enjoyed it once I got the hang of it. It definitely takes some practice,  but it was really relaxing and I love the way it turns out. For the sashing I used a wonderfully soft cotton/linen blend found on Sew Mama Sew.

For the binding I used a vintage sheet that matched just about perfectly. I was unsure of what color to go with when a friend said "I was thinking yellow!". Done. (Thanks Kristen!)

post signature

Monday, March 14, 2011

Closet Organization {Before and After}

       This closet was a mess. Unless a closet is built for little ones, it is so hard NOT to waste a whole bunch of space. And with the prospect of the little guy moving into that room in the next couple of months, that space became prime real estate. I KNEW I could use it better.

So, with my design, and my husband's know-how, we created a perfectly use-able, organized space, with places for shoes, clothes, blankets, out-of-season clothes, the whole bit. Let me show you around.

My favorite thing is these bins. They are canvas and have a sturdy wire frame AND a handy little vinyl pocket to put a label so my kids (and my husband) know where everything goes. (Found them at The Container Store)

I simply took a picture of a few of the items that belong in that particular basket, re-sized them to the pocket size in Photoshop, added text with picnik.com and printed them on card stock.

The main goal here was to manage BOTH kids clothes in ONE closet. That was simply not happening with the way it was before. but this way, Kai has his own bar and a shelf (or two) for his shoes and maybe some clothes or toys. This arrangement added so much space that we actually can't even fill it all up yet! But I'm sure that will change.
See those baskets on the top shelf? This was a system I started years ago when Emmie was only a wee little thing. she kept getting hand-me-downs from friends and family, which was GREAT, but most of them were a size bigger or a season later, so I needed to figure out a way to manage the influx of clothes. Not to mention, I needed an easy place to put all of the clothes that she was so quickly growing out of as well. So I bought her two baskets: one for clothes that she had grown out of and one for clothes that were the next size or season up. When the first basket gets full, I take it up to the attic and put it in it's appropriate Rubbermaid tub (we're...uh...obviously not done having kids yet, so I save ALL of their clothes...). When I find a great deal on end of season clothes, I buy a size bigger for the next year and stick it in the second basket. This is a fool-proof way to keep the clutter off the clothes racks and dresser.

One more look:


Hope you enjoyed the tour! Feeling inspired?? Motivated?? Go conquer a closet!! It feels marvelous! :)

Sharing the love at some of the following:
Monday:
Making the World Cuter Mondays
Keeping it Simple-- Motivate Me Mondays
Skip to my Lou-- Made by You Mondays
Sew Can Do-- Craftastic Monday 
C.R.A.F.T-- Making Monday Marvelous
Tuesday:
Sugar Bee-- Take a Look Tuesday
Today's Creative Blog-- Get Your Craft On!
Creative Itch-- Sew Cute Tuesday
Tip Junkie-- Tip Me Tuesday
Wednesday:
Sew Much Ado-- We Did It Wednesday!
Blue Cricket Designs-- Show and Tell
Someday Crafts -- Whatever Goes Wednesday
Show off Your Stuff -- Fireflies and Jellybeans
Friday: 
Simply Designing
Kojo Friday Fun Finds 
Fingerprints on the Fridge-- Feature Yourself Friday 
Tatertots and Jello-- Weekend Wrap-up
Weekend:
The Girl Creative-- Just Something I Whipped Up
Under the Table and Dreaming-- Sunday Showcase 
post signature

Tuesday, January 18, 2011

Travel Buddies


We do a lot of traveling. And almost all of it is in the car these days. So my kids needed something just their size.


Something with a little pocket for keeping their very special bits and things. And a handle for easy retrieving, or for clipping onto their backpack on an airplane trip.


I got the idea for this on MayaMade, although I didn't actually follow her instructions or measurements.

Here are my measurements and method:

(you'll need about a 1/2 yard to complete one pillow)
2 coordinating pieces: 9 1/2" x 14 1/2" for body
2 pieces: 7 1/2" x 6" for pocket
1- 4 1/2" x 12" piece for handle
Polyfil

Use 1/4" seams.

First I made the pocket by sewing the pieces right sides together, leaving a 4" hole on a long side to flip. Clip corners, turn, press, and sew along the side with the hole. This will be the top open side of your  pocket. Now place it on a pillow piece, pin and sew.

Then, fold your handle piece lengthwise, right sides together. Turn the tube right side out, press and edgestitch down both long sides.

Now, for the pillow. Take one piece and pin the handle, right sides together with raw edges matching. Then pin the other pillow piece right sides together. **Be sure your pocket is face the right direction! Sew the two sides together, leaving a 4" hole in the middle of one of the short ends. Clip the corners, turn and stuff with Polyfil. Then slipstitch the hole closed. You're done!

This was definitely one of their favorite mama-made Christmas presents, next to the playhouse, of course.

And my son was rather irritated that I dare to remove his pillow from his bed...

Thursday, January 13, 2011

Quilted Dish Mat


Okay, I have been wanting to make one of these for. ev. er. I finally did it! using some scraps of my favorite fabric of all time.


I used a thrifted terry cloth hand towel  for the bottom. For the top I simply took scraps from my stash and pieced them together until they fit the size of my towel. I didn't actually quilt the top to the bottom. All I did was sew the top to the bottom, right sides together, leaving a hole, flipped them right side out and edgestitched all along the edges, closing up the hole. Then I did sew along one of the quilted lines, just to prevent the two sides from separating too much when washed...just in case.


 I'm thinking I'm going to make one more, using only that vintage kitchen print. I LOVE that print. It's from a curtain I found in a giant mountain of fabric in a fabulous little flea market outside a tiny little mountain town in Southwest Colorado. I pray that store is still there next time I make my way in that direction...

Wednesday, January 12, 2011

Felt Flower Wreath

Remember my desperate need for color in my living room?? Well, I have been working hard on some pillows, which I will be showing you soon. But my mantel has been looking especially sad since the fall and Christmas decorations have disappeared, so I am working on that as well.

Here's a quick little project that adds a little pop of color to the room. Using this tutorial, I whipped up a handful of little felt flowers, cut out some leaves and simply hot-glued them to the wreath.


So what do you think???? Should I add more flowers??

Wednesday, December 15, 2010

Christmas Card Garland

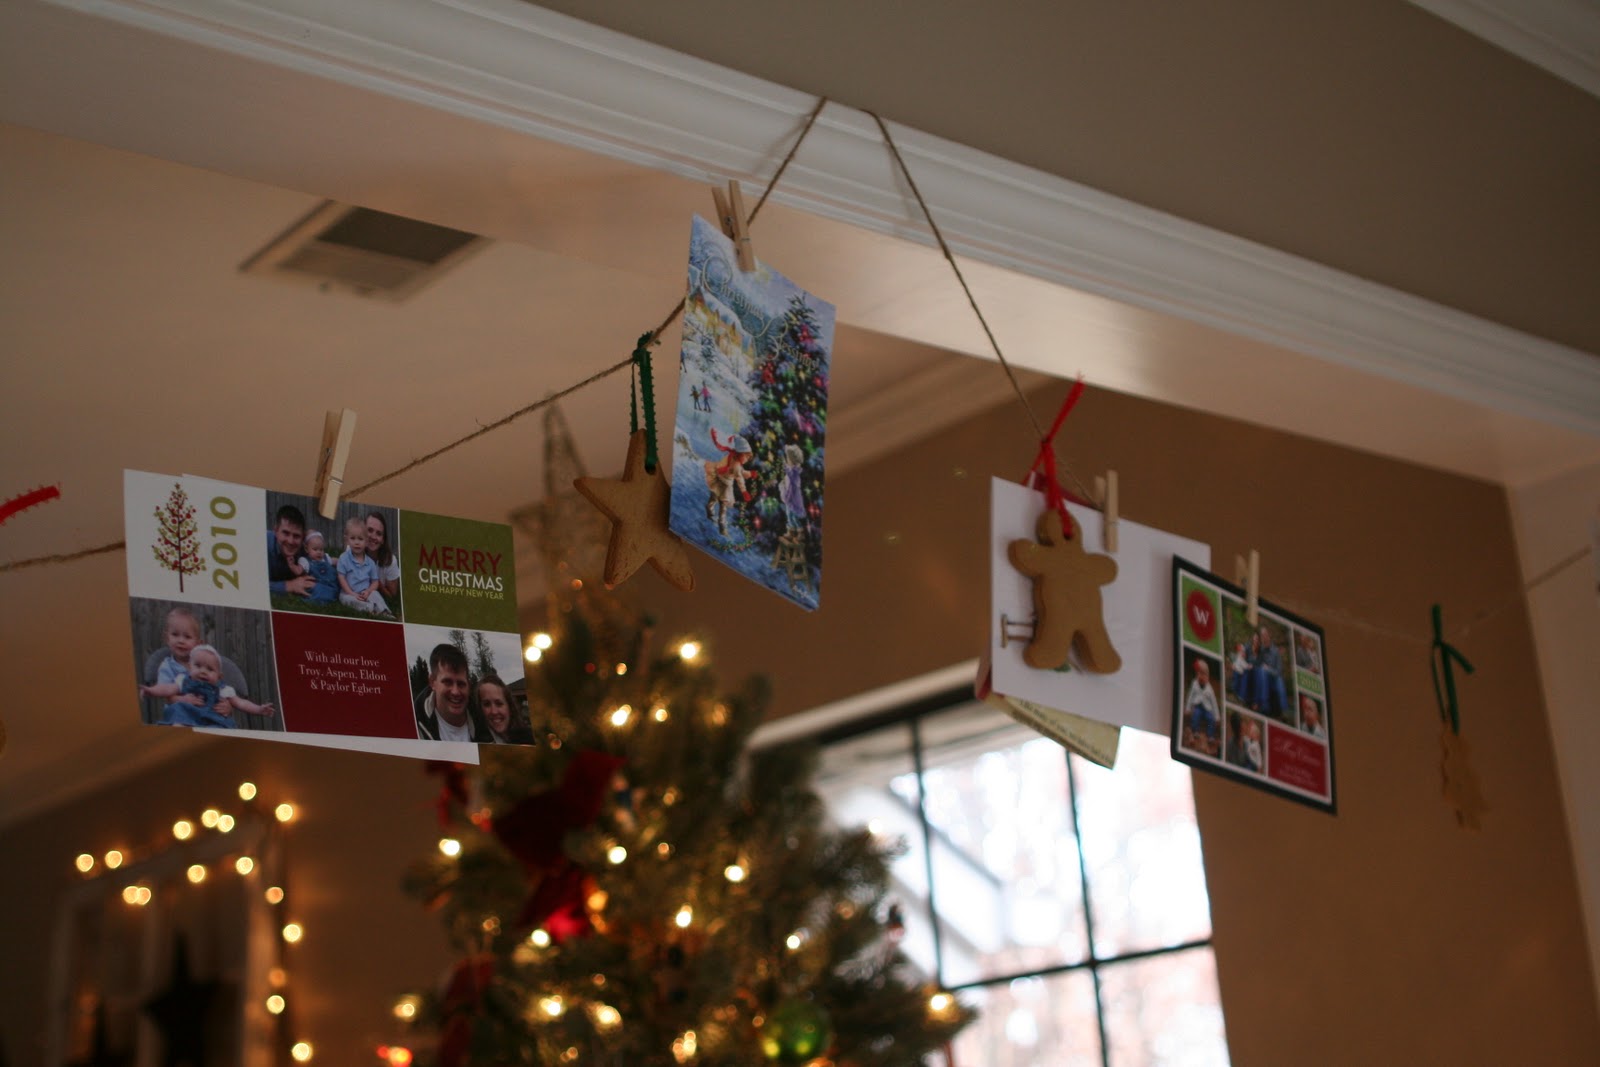
Well, I am finding that I am running into the same dilemma as Jill where so much of what I am making is FOR somebody and therefore I can't post it, for fear it will be spoiled. But here is something I just put up to house all those lovely cards and letters we've been receiving and that have just been stacking up on our kitchen counter.
I needed a solution that would be quick and easy to put up using supplies I already had. 
 So using a few thumb tacks, mini clothespins and some thin jute I got busy and it was up in about 5 minutes. Then I tied on a few of the Gingerbread ornaments we made to give a Christmas-y kick. We used this recipe for the cookies and got excellent results. And can I just say, my tree smells delicious with all those cookies on it.

Merry Christmas!!

Monday, November 1, 2010

The Mom Cave

This is my space where I breathe. I create things here. And plan things. And sometimes I get nothing done at all. Just catch a few quiet moments. Often times, it’s the place where I sit and simply watch my kids play, as we share a giant room, half mine, half theirs, just the way I wanted it, so we could play and create together throughout our days.

I have a good space, but I am overflowing. Sadly, there is no room for growth. I am always making an effort to use what I have, but alas, some fabrics I just cannot turn down, and so this happens.

This is my happy place. This is a mish mash of lovely things I have found along my way of creating this space. Treasures from our stay in Germany, treasures found in the basement of an estate sale, and treasures from flea markets and Etsy and even from the small hands of my little girl. All Equally loved.

I dream of a dainty little hutch filling this space. Displaying little lovelies, baskets of scrap fabric and finally having a logical place to store my scrapbooking supplies that are currently buried in a closet…

Friday, October 15, 2010

Fall is Here!

Even though the temperatures remain at around 75-80 degrees down here in the south, the leaves have turned and the soups have made their way into our weekly menu. I have put up our fall decor and lit the sweet smelling pumpkin pie candles.
This mantle still awaits a picture of our whole family together, but I'm working on that one. Other than that, I feel so pleased with how it warms up the room in the evenings, candle burning, lights dimmed. Love it.

Things may be a little quiet around here for a little while. I am working on something fun for the kids for Christmas and I hope to get it done soon enough that I will be able to put up a series of tutorials for you to complete your own before Christmas. Are you curious? Good:)

Thursday, October 7, 2010

Artwork Display

This is looooong overdue. My daughter has the tendency to tape her artwork (and there is plenty of that around here) all over the house: from the mantle, over her bed, on various kitchen cabinets, you name it. So I needed to create a place for her to display her work where she knows it will be seen and she can be proud.

This was so very simple to create. At Home Depot they have a section of particularly cut and finished wood. These were the perfect size (they have longer ones, if you're interested). Then I picked up the bulldog clips from Office Depot. These are the magnetic ones, which are perfect because they have a nice flat back to glue to the board. I used my handy Gorilla Glue to adhere them to the wood. Then I put picture hanging hardware on the back and voila! It was so easy and the little one is so proud.

Tuesday, October 5, 2010

Handmade Train Table

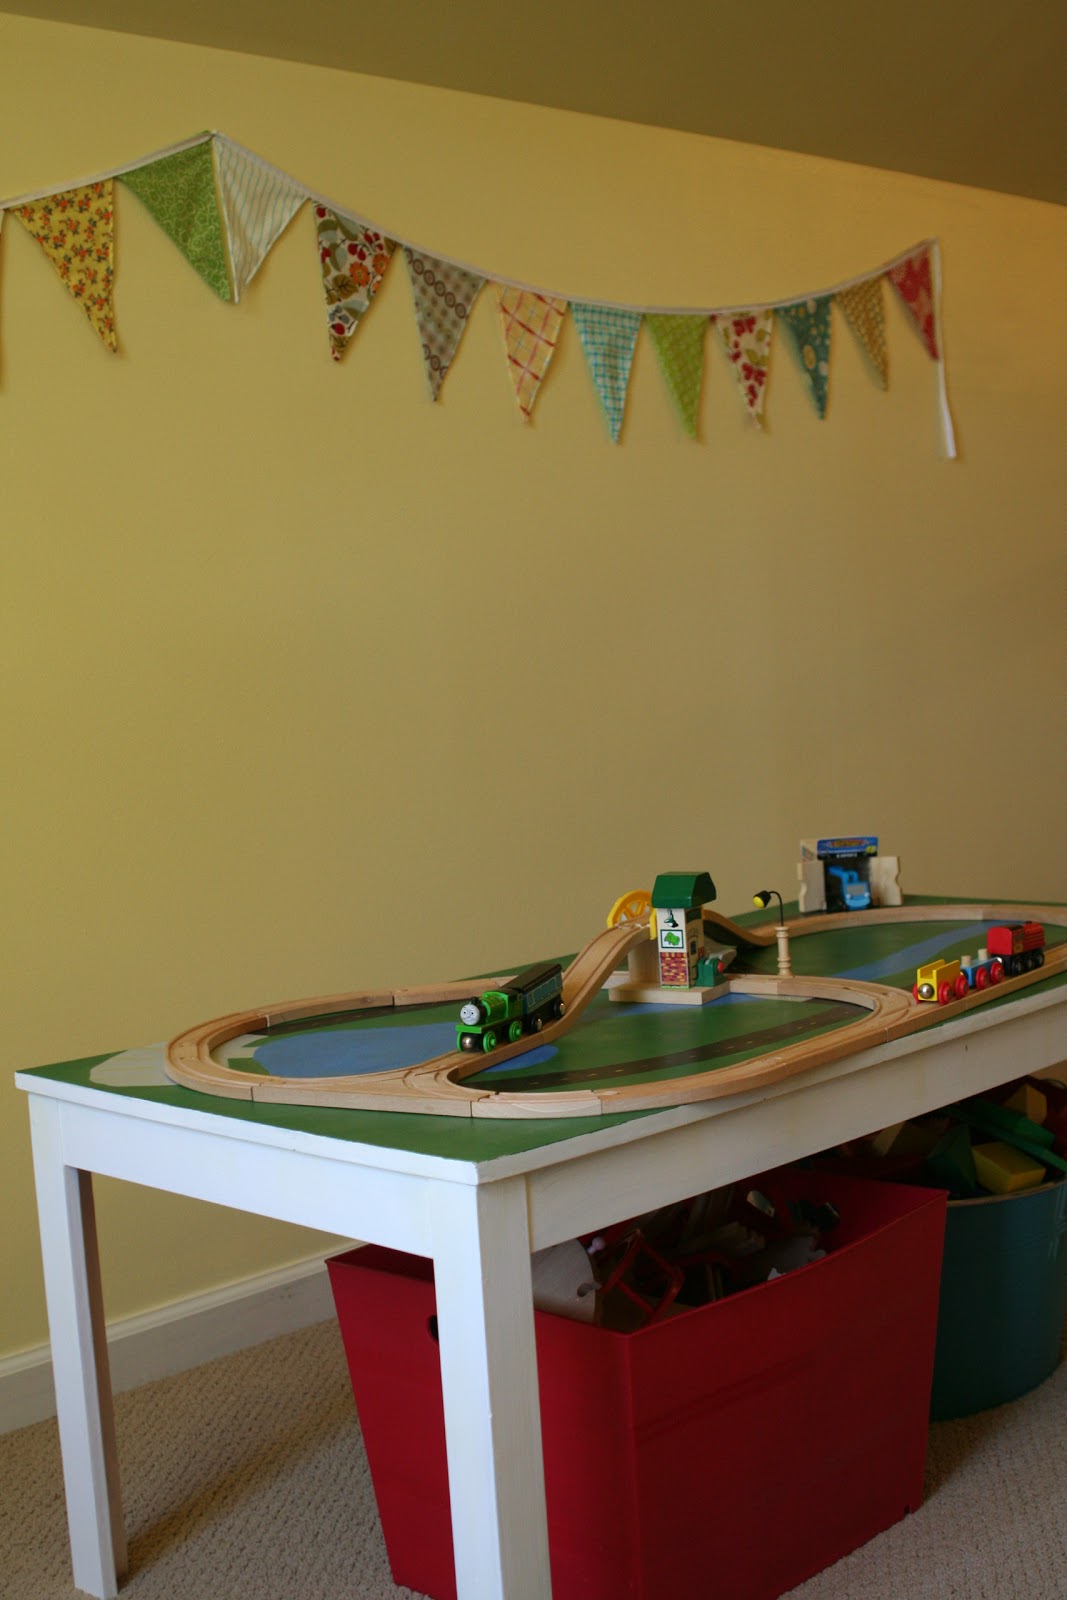
Now don't get me wrong, I did not MAKE the table, but I did paint it. I found this table for $10 at the thrift store and decided to make it into a train/activity table for little ones in my life. And let me tell you, it has been a HIT! I debated back and forth on whether or not I should add a rim to the edge of the table to keep things from falling off, so I let the kids play with it for awhile and realized that more often than not, they created track systems that hung over the sides a bit anyway, so I decided to leave it off.
My Method:: This table was originally a very scratched, shiny ugly brown color with a wobbly leg. I got it home and immediately tightened the leg. Then I covered the whole thing with a good coat of spray primer to accomplish two things: first, make it so the top coat of paint would easily stick and second, to fill in the many scratches. Then I spray painted the whole table white, except the top, which would be painted other colors, obviously. And then I took my supply of acrylic paints and had a ball! It was my daughter's idea to make the water sparkly, I just used some of her sparkly craft paint for that. After all was painted and dried I covered the whole top of the table with a nice coat of spray enamel to keep it protected from the inevitable active play it will receive in its lifetime:)

Also, I didn't want to over decorate the table (in paint) with things like trees and houses and such because I really wanted my children to use their imaginations and create those things on their own. I just wanted this to be an open-ended table, allowing them to use for whatever they fancy.

So, next time you get discouraged looking at the pricey train tables, consider picking up an inexpensive secondhand table and doing it yourself. The project, start to finish, only took me about 4 hours (including drying time). It was easily finished in two naptimes:) And only cost me $15, for the table and spray paints.  (the acrylics I had on hand...)

I hope you feel inspired for a little DIY!

Also, I went ahead and entered this into the Crafting with the Stars competition over at Sew Dang Cute. It sounds like a lot of fun, you should go check it out!


Sharing the love at some of the following:
Monday:
Keeping it Simple-- Motivate Me Mondays
Skip to my Lou-- Made by You Mondays
Sew Can Do-- Craftastic Monday 
C.R.A.F.T-- Making Monday Marvelous
Tuesday:
Today's Creative Blog-- Get Your Craft On!
Creative Itch-- Sew Cute Tuesday
Tip Junkie-- Tip Me Tuesday
Wednesday:
Sew Much Ado-- We Did It Wednesday!
Blue Cricket Designs-- Show and Tell
Friday:Simply Designing
Kojo Friday Fun Finds 
Fingerprints on the Fridge-- Feature Yourself Friday 
Tatertots and Jello-- Weekend Wrap-up
Weekend:
The Girl Creative-- Just Something I Whipped Up
Under the Table and Dreaming-- Sunday Showcase

Thursday, September 9, 2010

Conkerr Cancer

Do you have 20 minutes?? Make a pillowcase for Conkerr Cancer! So easy and it is certain to make a child smile. Can't beat that reward, right?

I am so inspired by the work of Craft Hope, that thousands of women are gathering all over the planet to work toward one cause. Makes me feel powerful. And useful. For so many of us with little ones at home it isn't feasible for us to get out and serve people everyday. But Craft Hope gives us a way that we can continue doing what we enjoy doing anyway (crafting!), only we can do it for a greater cause. Because of this, I gathered some friends together one morning and we cranked out 14 pillowcases for Conkerr Cancer, which is the current project for Craft Hope right now (deadline is Sept 15th if you want to join!). Our particular pillowcases will bring smiles to the children of our local hospital, Arkansas Children's Hospital.

**If you're looking for an easy pillow case tutorial, Dana has a great one over at MADE.

Be sure to keep up with Craft Hope, as she is always listing a new project. There just might be something you can help with!

Monday, September 6, 2010

Upcyled Napkin Rings Tutorial

We needed napkin rings for all of those fun family napkins we made a month ago. I was trying to think of what to make them with when my genius husband said, rather nonchalantly, "we have all those shower curtain rings upstairs...". Genius! I tell you. And they are perfect! And the best part is, I always see shower curtain rings at the thrift store, so if you want to make your own then you can pick them up for cheap. They were super easy to do.

What you'll need:
shower curtain rings
ribbon (just assume you need lots, about a yard+ per ring)
glue gun

First, you open up the ring, insert the end of the ribbon and close the ring on the ribbon.

Start wrapping, overlapping each layer by about half until you make it back to the enclosure.

Once you get to the enclosure wrap the ribbon around it several time until it becomes the same thickness as the rest of the ring.

Now get your glue gun and glue the end of the ribbon down and cut off any excess.

There you go! Easy peasy. And now, every night after dinner we take a look at our napkin and if it could still get some use before it needs a good wash then we put it back in our own ring until our next meal. Enjoy!

I'll be sharing the love here:
mmm button

Get Your Craft On Tuesday
Related Posts Plugin for WordPress, Blogger...